Hướng dẫn tháo lắp PC – phụ kiện
Hướng dẫn tháo lắp khay ổ cứng (Instructions for the hard drive tray) Dell Optiplex Micro 3020 9020 3040 7040 3050 5050 7050 3060 5060 7060 3070 5070 7070
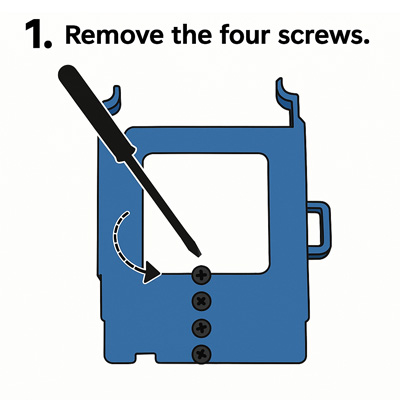
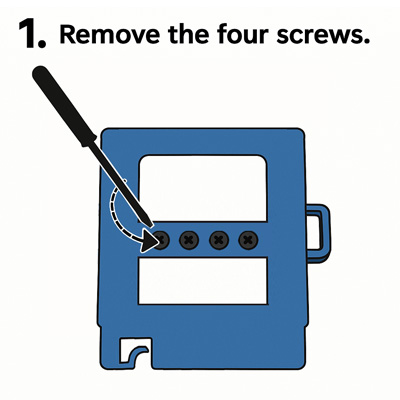
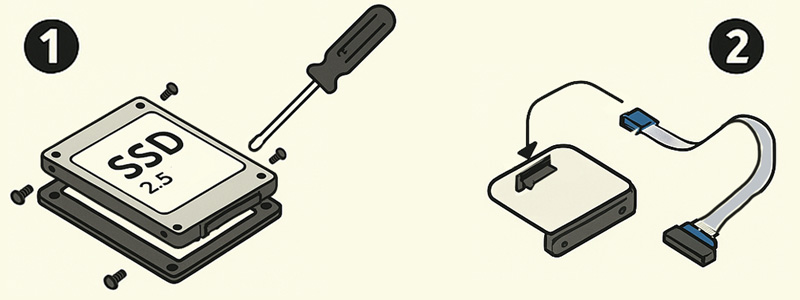
Bước 1: Dùng vít tháo 4 con ốc trên khay nhựa.
Step 1: Remove the 4 screws on the tray.
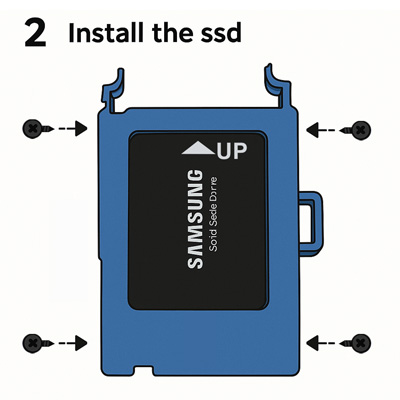
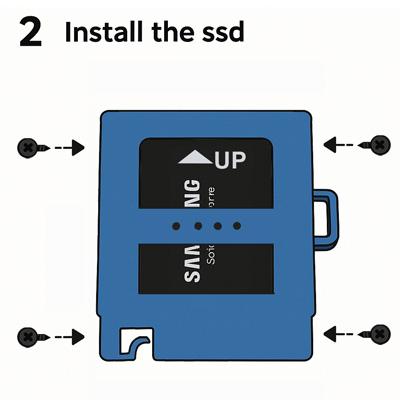
Bước 2: Dùng 4 con ốc này gắn ổ cứng vào khay nhựa.
Step 2: Use these 4 screws to attach the hard drive to the tray.
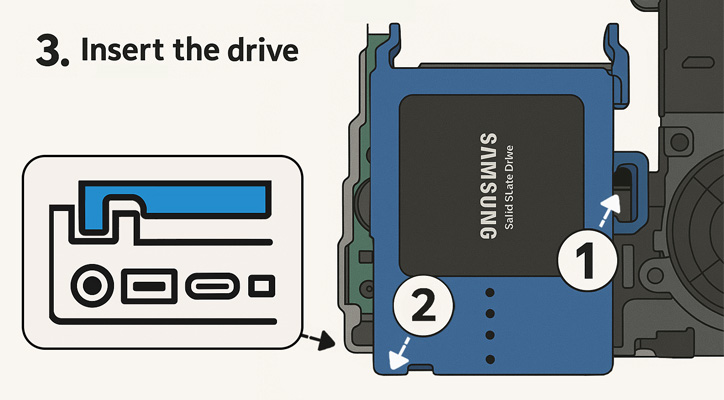
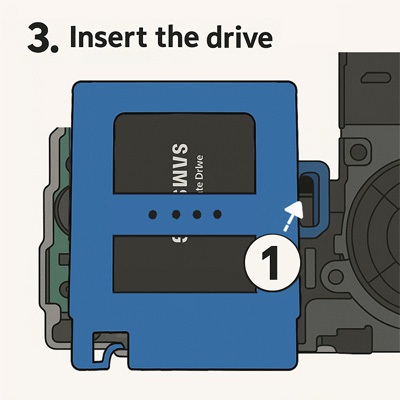
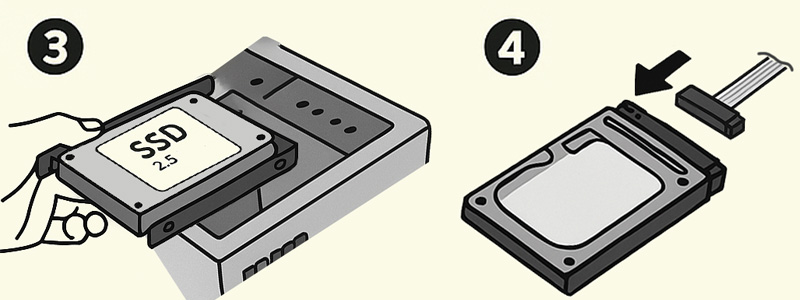
Bước 3: Lắp khay ổ cứng vào khung máy. Quan sát phần bên trái (vị trí số 1) và phải (vị trí số 2) đã vô ngàm chưa.
Step 3: Install the hard drive tray into the chassis. Check that the left (position 1) and right (position 2) sides are seated properly.
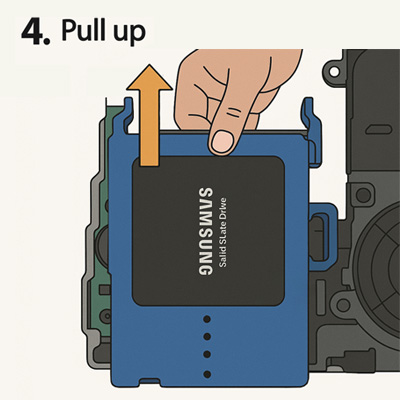
Bước 4: Quan sát phần đầu sata đã vô ngàm chưa.
Rồi hãy trượt khay vào. Kéo khay ổ cứng theo chiều mũi tên.
Step 4: Check to see if the sata head part is mounted.
Pull the hard drive tray in the direction of the arrow.
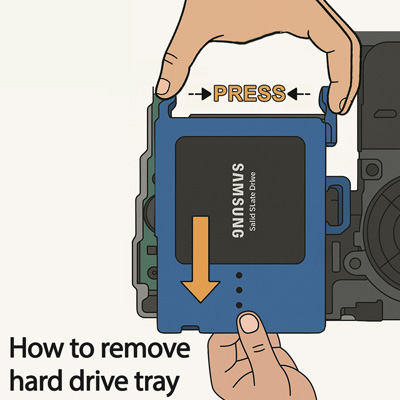
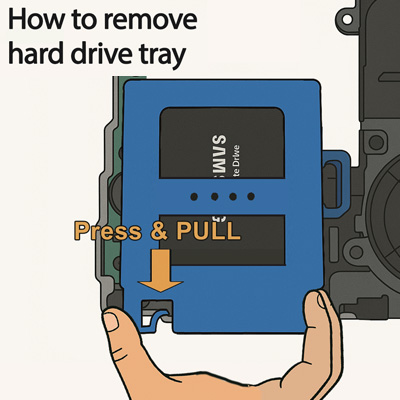
Cách tháo gỡ khay ổ cứng:
Dùng một tay bóp nhẹ đầu trên khay, một tay kéo xuống theo chiều mũi tên.
How to remove the hard drive tray:
Use one hand to gently squeeze the top of the tray, and use the other hand to pull down in the direction of the arrow.
Hướng dẫn tháo lắp khay ổ cứng (Instructions for the hard drive tray) Dell Optiplex Micro 3080 5080 7080 3090 5090 7090
Bước 1: Dùng vít tháo 4 con ốc trên khay nhựa.
Step 1: Remove the 4 screws on the tray.
Bước 2: Dùng 4 con ốc này gắn ổ cứng vào khay nhựa.
Step 2: Use these 4 screws to attach the hard drive to the tray.
Bước 3: Lắp khay ổ cứng vào khung máy. Quan sát phần bên trái (vị trí số 1) và phải (vị trí số 2) đã vô ngàm chưa.
Step 3: Install the hard drive tray into the chassis. Check that the left (position 1) and right (position 2) sides are seated properly.
Bước 4: Quan sát phần đầu sata đã vô ngàm chưa.
Rồi hãy trượt khay vào. Kéo khay ổ cứng theo chiều mũi tên.
Step 4: Check to see if the sata head part is mounted.
Pull the hard drive tray in the direction of the arrow.
Bước 1 tháo gỡ khay ổ cứng:
Dùng một tay bóp nhẹ đầu trên khay, một tay kéo xuống theo chiều mũi tên.
Step 1 – How to remove the hard drive tray:
Use one hand to gently squeeze the top of the tray, and use the other hand to pull down in the direction of the arrow.
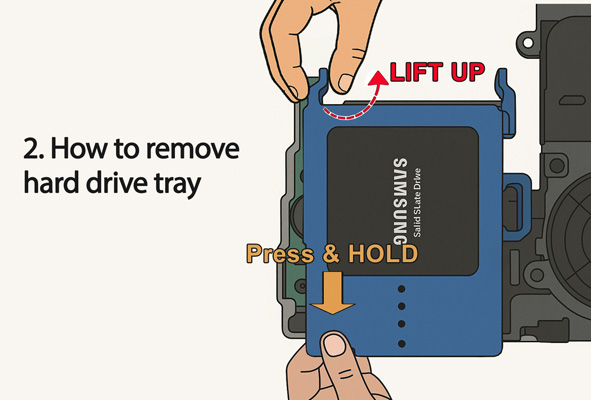
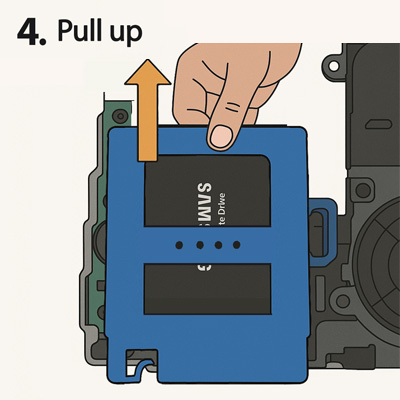
Bước 2 tháo gỡ khay ổ cứng: (quan trọng)
Dùng một tay giữ vị (trí màu cam trong hình), tay kia nhấc ở đầu lên (trí màu đỏ trong hình)
Step 2 – How to remove the hard drive tray:
Use one hand to hold the position (orange position in the picture), the other hand to lift the head up (red position in the picture)
Hướng dẫn tháo lắp khay ổ cứng (Instructions for the hard drive tray) Dell Optiplex Micro 3000 5000 7000 3010 5010 7010 7020
Bước 1: Dùng vít tháo 4 con ốc trên khay nhựa.
Step 1: Remove the 4 screws on the tray.
Bước 2: Dùng 4 con ốc này gắn ổ cứng vào khay nhựa.
Step 2: Use these 4 screws to attach the hard drive to the tray.
Bước 3: Lắp khay ổ cứng vào khung máy. Quan sát phần bên trái (vị trí số 1) đã vô ngàm chưa.
Step 3: Install the hard drive tray into the chassis. Check that the left (position 1) is seated properly.
Bước 4: Quan sát phần đầu sata đã vô ngàm chưa.
Rồi hãy trượt khay vào. Kéo khay ổ cứng theo chiều mũi tên.
Step 4: Check to see if the sata head part is mounted.
Pull the hard drive tray in the direction of the arrow.
Cách tháo gỡ khay ổ cứng:
Dùng tay bóp nhẹ và kéo xuống theo chiều mũi tên.
How to remove the hard drive tray:
Use hand to gently squeeze and pull down in the direction of the arrow.
Hướng dẫn tháo lắp khay ổ cứng (Instructions for the hard drive tray) HP Elitedesk / Prodesk
Hướng dẫn:
- Bước 1: dùng vít tháo 4 con ốc trên khay nhựa, dùng ốc gắn ổ cứng vào khay
- Bước 2: gắn cáp sata vào máy
- Bước 3: gắn khay cùng ổ cứng cố định vào khung máy
- Bước 4: gắn đầu sata vào ổ cứng
How to use:
- Step 1: Remove the 4 screws on the tray. Use screws to attach the hard drive to the tray
- Step 2: Attach the sata cable to the mainboard
- Step 3: Mount the tray and hard drive to the chassis
- Step 4: Attach the sata head to the hard drive
Hướng dẫn tháo lắp khay ổ cứng (Instructions for the hard drive tray) Lenovo Thinkcentre
Hướng dẫn:
- Bước 1: tháo 4 con ốc trên khay, dùng 4 ốc này gắn ổ cứng vào khay
- Bước 2: gắn cáp sata vào máy
- Bước 3: gắn khay cùng ổ cứng cố định vào khung máy
- Bước 4: gắn đầu sata vào ổ cứng
How to use:
- Step 1: remove the 4 screws on the tray, use these screws to mount the hard drive into the tray
- Step 2: Attach the sata cable to the mainboard
- Step 3: Mount the tray and hard drive to the chassis
- Step 4: Attach the sata head to the hard drive